
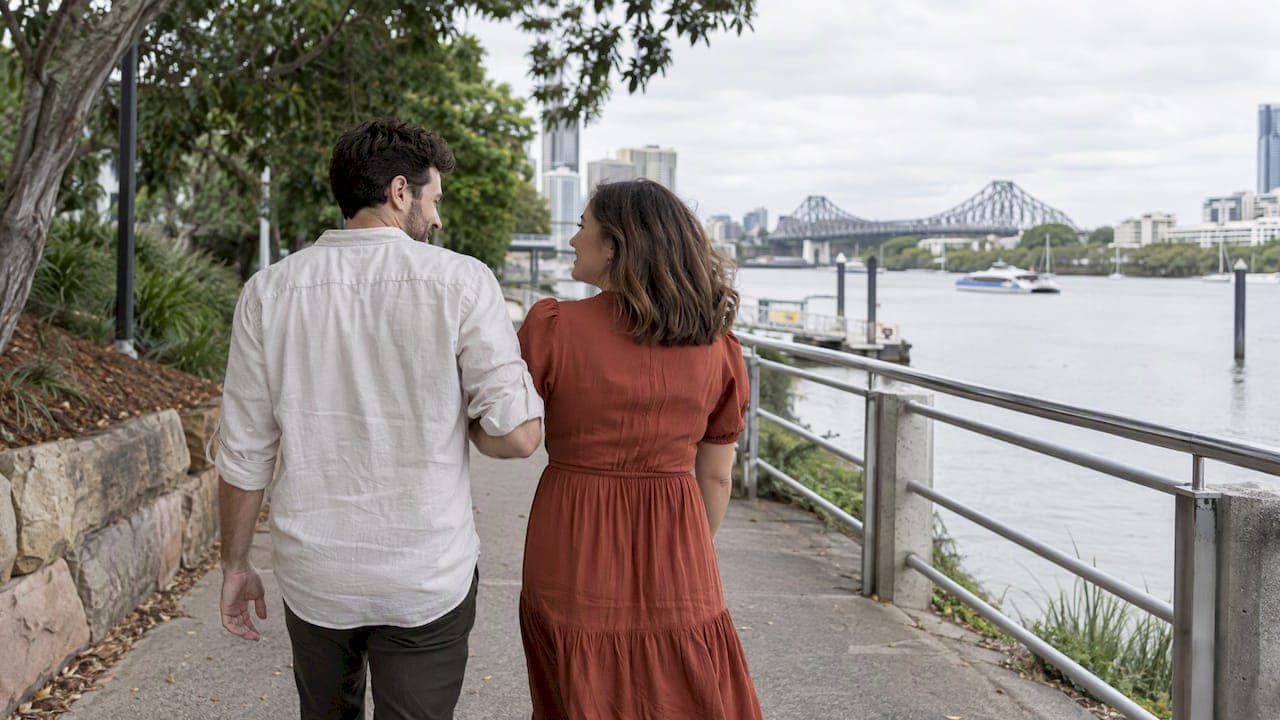
Yes, photos are a great choice for save-the-dates. They add personality and give guests a real feel for who you are as a couple. Send them 6 to 8 months before a local wedding, earlier for a destination celebration, and choose high-resolution images that reflect your wedding theme.
Key Takeaways
High-quality, natural-looking save-the-date photos taken by a professional photographer enhance wedding announcements with personality and cohesive design.
| Point | Details |
|---|---|
| Choose the right photo | Select a high-resolution image that reflects your personality, wedding theme, or venue for a more personal and memorable announcement. |
| Coordinate outfits effectively | Opt for complementary colors and fabrics with movement, avoiding fine patterns to ensure they photograph well and look relaxed. |
| Use simple, natural poses | Prompt natural movements like walking or sharing a laugh to produce authentic images that feel unstaged and genuine. |
| Incorporate venue or theme elements | Use locations, props, and colors that echo your wedding style to create visual continuity and subtle cohesion. |
| Twosixhundredphotography offers natural, unposed photos | We specialize in candid, documentary-style images that capture authentic moments, making your save-the-date memorable. |
Table of Contents
- 1. Fifteen creative save-the-date photo ideas worth trying
- 2. What to wear and how to pose for save-the-date photos
- 3. Design and layout tips: pairing photo, typography and template choices
- 4. When to send save-the-dates and what to include
- 5. How a photographer can lift your save-the-date photos
- 6. Post-shoot considerations: editing styles and turnaround times
- 7. Creative ways to share save-the-date photos beyond traditional cards
- 8. Tips for selecting the right photographer for save-the-date sessions
- 9. How to incorporate venue or theme into save-the-date images
- Our approach to natural, unposed save-the-date photos
- Ready to book your save-the-date session with a professional photographer
- FAQ
- Sources
1. Fifteen creative save-the-date photo ideas worth trying
A good save-the-date photo tells guests something true about you, so we have gathered ideas across styles and settings to help you find one that fits.
- Candid walking shot: capture you mid-laugh or mid-conversation rather than posed and facing the camera.
- Portrait close-up: a simple, well-lit headshot-style photo works beautifully for minimalist designs.
- Location-led shot: use the spot where you got engaged or plan to marry as your backdrop.
- Film-look photo: grainy, warm-toned film images add a nostalgic, timeless feel.
- Flatlay with rings and details: lay out your rings, invitation mock-up and a few florals for a styled, editorial look.
- Prop-based shot: a chalkboard sign, balloons spelling your date, or a custom banner can anchor the image.
- Pet-inclusive photo: including a dog or cat adds warmth and often becomes the shot guests remember.
- Seasonal shot: autumn leaves, snow, or a summer beach backdrop root the image in a specific time and place.
- Black-and-white portrait: strips away colour distraction and puts the focus on expression.
- Photo collage: three or four smaller images tell a fuller story than one single shot.
- Destination-themed photo: a shot at an airport, a map, or a landmark signals a destination wedding immediately.
- Action shot: dancing, jumping or walking away from the camera feels far less stiff than a static pose.
- Silhouette shot: shooting into the sunset creates a romantic, graphic image that works well in print.
- Over-the-shoulder shot: one partner looking back at the camera feels intimate and spontaneous.
- Getting-ready detail shot: a stolen moment before an engagement shoot, like lacing up boots or adjusting a tie, adds texture.
For each idea, think about light first. Soft, early morning or late afternoon light is more forgiving on skin and clothing than the harsh glare of midday sun. Props should support the story, not crowd the frame, and pets photograph best on lead with treats nearby to hold their attention.
Pro Tip: Keep talking to each other during the shoot rather than staring at the lens. Genuine reactions almost always beat a forced smile.
2. What to wear and how to pose for save-the-date photos
Wardrobe choices matter more than most couples expect, because colour and texture read differently on camera than in person.
- Coordinate colours rather than matching outfits exactly: complementary tones photograph better than identical ones.
- Avoid fine patterns like tight stripes or small checks, which can create a distracting flicker effect in photos.
- Choose fabrics with movement, such as flowy dresses or soft knits, over stiff or shiny materials.
- Try a "walk and talk" pose where you move naturally towards the camera mid-conversation.
- Try a forehead-to-forehead pose, which almost always produces a relaxed, affectionate expression.
- Try a laughing prompt, where one partner whispers something silly just before the shutter clicks.
Keep grooming simple. Matte skin reads better than shine under flash or sunlight, and one or two accessories photograph more clearly than a stack of jewellery competing for attention.
3. Design and layout tips: pairing photo, typography and template choices
Once you have a photo you love, the next decision is whether it leads the design or supports it. A photo-first template puts the image front and centre with minimal text, which suits couples with a striking or emotional shot. A text-first template uses the photo as a smaller accent, which works well when your names and date need to stand out, such as for formal or destination weddings.
When placing text over a photo, use a semi-transparent contrast box or overlay so your wording stays legible against busy backgrounds, and favour a bold or medium font weight over thin, delicate type that can disappear against skin tones or foliage.
- For print, use a high-resolution file, ideally 300 DPI, so your image does not blur or pixelate.
- For digital sharing, a smaller file size at 72 DPI keeps load times fast without losing visible quality.
- Save a master copy in JPG or PNG so you can resize for cards, social posts and your wedding website without starting over.
Many online template editors support formats like PSD, AI, PDF, JPG and PNG, and the better ones accept high-resolution photo uploads with flexible text blocks, which makes last-minute edits far less stressful.
4. When to send save-the-dates and what to include
Timing depends on where your wedding is happening and how far guests need to travel.
- For a typical local wedding, send save-the-dates 6 to 8 months before the date.
- For a destination wedding, send them earlier, around 8 to 12 months ahead, so guests have time to book flights and accommodation.
Earlier is better for destination weddings: giving guests 8 to 12 months' notice rather than the standard 6 to 8 lets them plan travel logistics without feeling rushed.
Every save-the-date, regardless of style, should include your names, the wedding date, a general location, and a line noting that a formal invitation will follow. If you have one, add your wedding website so guests can check details as they firm up. For destination weddings, a short note about accommodation options or a rough itinerary is genuinely useful, and if children or dress code are relevant, a brief mention saves confusion later.
5. How a photographer can lift your save-the-date photos
Hiring a photographer for your save-the-date shoot gives you a level of light, composition and editing consistency that is hard to match with phone photos alone. We approach these sessions the same way we shoot weddings, favouring candid, documentary moments over stiff posing, with both digital and film options available depending on the look you want.
A short brief helps any photographer deliver what you actually need:
- State the intended use (print card, digital share, or both) and the final print size if relevant.
- List any must-have shots, such as a pet, a specific location or a prop.
- Share wardrobe plans in advance so colours and textures can be considered for lighting.
Pro Tip: If you plan to use edited engagement images for your save-the-dates, book the shoot at least two months before your intended send date to leave room for editing and printing.
6. Post-shoot considerations: editing styles and turnaround times
Once the shoot wraps, editing style shapes the final feel of your photo as much as the shoot itself did. A natural, true-to-colour edit keeps skin tones and backgrounds looking realistic, which suits most modern save-the-date designs. A warmer, film-inspired edit adds grain and muted tones for a nostalgic feel, while a black-and-white conversion can simplify a busy background and put full focus on expression.

Turnaround time varies depending on the photographer and the season, so it is worth asking upfront how long you should expect to wait between the shoot and receiving final images. Wedding and engagement seasons, typically spring and autumn, tend to extend turnaround times because photographers are juggling more bookings. Building in a buffer of a few weeks beyond the quoted turnaround protects your send date if anything runs behind schedule.
If you are planning to print your save-the-dates, ask for files delivered at a print-ready resolution rather than web-optimised versions, which can look soft or pixelated once enlarged. Requesting both a high-resolution file for print and a compressed version for digital sharing means you are covered for every format without needing to go back and forth after delivery. A quick conversation about these details before the shoot saves a lot of back-and-forth once the gallery arrives.
7. Creative ways to share save-the-date photos beyond traditional cards
Printed cards are not the only way to let guests know your date, and plenty of couples are now using digital-first formats as their primary announcement. A short video, even 15 to 30 seconds, stitched together from engagement photos and a simple text overlay, works well shared directly through a group chat or social post.
Posting your favourite photo on social media with your date and a simple caption reaches guests instantly and costs nothing to send. Many couples now pair a digital save-the-date with a wedding website, which keeps the visual simple while linking out to accommodation details, registry information and a more detailed itinerary.
A digital save-the-date sent by email or text also makes sense for destination weddings, where guests need to act quickly on travel bookings and a physical card might arrive too late to be useful. Some couples send both: a digital version early for urgency, followed by a printed card a little closer to the date as a keepsake. Whichever format you choose, keep the core details, names, date and general location, consistent across every version so there is no confusion.

8. Tips for selecting the right photographer for save-the-date sessions
Look through a photographer's portfolio for consistency rather than just a handful of standout images, since consistency tells you what to expect from your own gallery. Pay attention to how couples look in candid moments specifically, not just posed portraits, since that is usually the harder skill to get right.
Ask about their approach to directing couples who feel awkward in front of a camera. A photographer who talks you through prompts and keeps the shoot relaxed, rather than issuing rigid poses, tends to produce more natural results. It is also worth asking about digital and film options if you like the idea of mixing textures in your final gallery.
Confirm turnaround time, file formats and how many images you can expect, so there are no surprises once the shoot is done. If your shoot is happening at a specific venue, check photography requirements in advance, since some locations place limits on timing or equipment. For guidance on vetting a photographer more broadly, our notes on finding your perfect wedding photographer in Brisbane cover the same questions in more depth.
9. How to incorporate venue or theme into save-the-date images
Shooting at or near your wedding venue gives guests a visual preview of where they are heading, which works especially well for destination or landmark weddings. If visiting the actual venue is not possible, choose a location that echoes its feel, a beach for a coastal wedding, a garden for a botanical theme, or a city laneway for an urban celebration.
Theme can also come through in smaller details rather than the whole setting. A couple planning a rustic wedding might shoot near timber fencing or in a paddock, while a couple planning a formal black-tie event might choose a polished architectural backdrop instead. Props tied to your theme, a vintage car, a surfboard, a bouquet in your wedding colours, reinforce the connection without needing to spell it out in words.
Colour palette matters here too. If your wedding has a defined colour scheme, echoing it subtly in wardrobe or props ties your save-the-date visually to the invitations and signage guests will see later. The goal is a thread guests notice without realising why it feels cohesive, long before the full suite of wedding stationery arrives.
Our approach to natural, unposed save-the-date photos
We shoot candid and documentary-style photography because the moments that happen between poses are usually the ones people remember. Two things help on the day: keep moving instead of freezing for the camera, and talk about something unrelated to photos entirely, a shared joke works every time.
— Charlie
Ready to book your save-the-date session with a professional photographer
A short, relaxed session gives you the real, unposed images that make save-the-dates feel personal rather than generic. We offer options to suit different timelines and budgets, including shorter and longer sessions if you want more variety for your gallery.

- Browse full pricing and packages to compare session lengths and inclusions.
- Ask about add-on photobooth hire if you are planning an engagement party alongside your shoot.
- Get in touch to check availability and talk through what you want your save-the-dates to look like.
FAQ
What photos to use for save-the-dates?
Choose a photo that reflects your personality or your wedding theme, whether that is a candid shot, a portrait, or an image taken at your venue. A high-resolution engagement photo is the most common choice, though a casual snapshot with personal meaning works just as well.
Do save-the-dates have photos on them?
Many do, since a photo adds personality and helps guests put a face to the invitation, but it is not required. Text-only designs with typography and colour are a common alternative for couples who prefer a simpler look.
What to wear for save-the-date photos?
Coordinate colours rather than matching outfits exactly, and avoid fine patterns that can distract on camera. Choose fabrics with movement, like flowy dresses or soft knits, over stiff or shiny materials for a more relaxed result.
How to pose for save-the-date photos?
Simple prompts like walking together, standing forehead to forehead, or sharing a laugh tend to produce the most natural results. Moving during the shoot rather than freezing in one spot also helps avoid a stiff, overly posed look.
Sources
- When should you send out save the dates ? | Expert Wedding Advice
- Everything you need to know about destination wedding save-the-dates | Easy Weddings
- SAVE THE DATE TEMPLATE (administrative handbook excerpt)